
Table of Contents
- Why a Cat Window Perch Beats a Cat Tree in a Rental
- No-Drill Cat Window Perch Options Ranked by Effort
- How to Build a DIY Cat Window Hammock With Wood and Fabric
- Cat Window Perch Suction Cups: What Actually Holds
- Cat Window Perch Safety: Load Limits and Fall Prevention
- Matching the Perch to Your Window Type and Size
- Costs, Tools, and Build Time for Each Idea
- Frequently Asked Questions
Last Updated: October 17, 2026
Why a Cat Window Perch Beats a Cat Tree in a Rental
A cat window perch is a small platform that mounts on glass so your cat can sit, sleep, and watch the outside world.
That matters in a rental. Cat trees are bulky, hard to move, and often leave marks on walls and carpets.
At Proudpetshop, we talk to a lot of apartment cat owners.
Renters also have a second problem. Landlords dislike holes in walls.
Below, we break down the builds by effort level, plus the safety limits most guides skip.
No-Drill Cat Window Perch Options Ranked by Effort
The easiest no-drill cat window perch uses suction cups and needs no tools. The hardest uses a tension rod and shelf brackets and takes an afternoon. Everything else sits between those two.
Here is the range, from least to most effort:
- Suction cup hammock: minutes to install, no tools
- Old tray perch: under an hour, one drill-free bracket set
- Tension rod shelf: one to two hours, no wall holes
Tension Rod and Shelf-Bracket Builds
A tension rod wedged between the window frame and a shelf bracket gives you a sturdy seat with zero wall damage. The rod presses against the frame, and the bracket carries the shelf.
This works best on windows with a deep, solid frame. Measure the opening first, then pick a rod rated for more than your cat's weight. A common mistake is buying a cheap shower rod that bows under a jumping cat.
The Old Tray Perch
An old serving tray becomes a cat window seat with two suction-cup hooks and a strip of fabric. It is the cheapest idea on this list and the one renters copy most.
Sand the tray edges so nothing splinters. Glue a piece of batting to the top, then wrap it in faux fur or fleece. Hang the tray from the hooks and check that it sits level before your cat tries it.
How to Build a DIY Cat Window Hammock With Wood and Fabric
A DIY cat window hammock built from wood and fabric gives you the most control over size, cushioning, and looks. Expect a two-hour build and a trip to the hardware store.
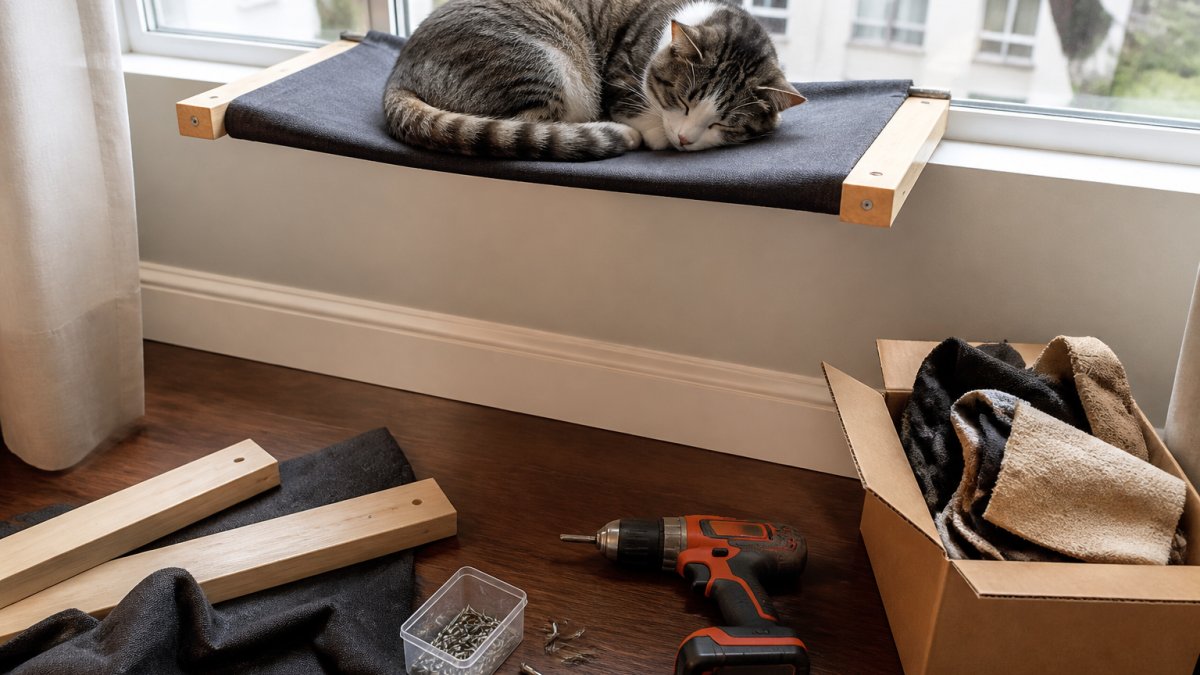
Here is the build, step by step:
- Measure the window. Cut a plywood board about 5 cm narrower than the glass on each side.
- Sand every edge. Round the corners so no cat catches a claw.
- Add support. Fit two shelf brackets or a tension frame under the board.
- Cut the batting. Trim it to the board size, then wrap it over the top.
- Staple the fabric. Pull fleece or faux fur tight and staple it underneath.
- Test the load. Press down hard with your hand before your cat gets near it.
Expected result: a level, cushioned platform that holds steady when your cat jumps on and off.
Cat Window Perch Suction Cups: What Actually Holds
Suction cups hold a cat window perch when the glass is clean, smooth, and flat.
That is the honest answer most guides avoid. Suction cups are strong, but only on the right surface.
To get a grip that lasts:
- Clean the glass with rubbing alcohol and let it dry fully
- Warm the cups in your hands before pressing them on
- Press from the center out to push out air
Skip suction cups on frosted glass, window film, or any pane with a texture you can feel with a fingernail. They need a smooth seal to hold.
Proud Pet Shop Sunspot Perch →
Cat Window Perch Safety: Load Limits and Fall Prevention
Cat window perch safety comes down to two numbers: the weight the perch holds and the height it sits above the floor. Get either wrong and your cat takes a fall.
Check the rated weight on the box, then subtract a margin. A cat that weighs 4.5 kg can land with far more force than that when it jumps. Pick a perch rated well above your cat's weight.
For fall prevention:
- Place the perch low for the first week
- Add a soft landing spot below, like a cushion or bed
- Check brackets and cups after the first few jumps
Matching the Perch to Your Window Type and Size
Window type decides which perch you can use, and the wrong match is the most common reason a renter-built perch fails. Suction builds need smooth, flat glass. Tension builds need a solid frame with parallel sides. Small windows need a narrow shelf, not a full hammock. Measure before you buy or build, and match the mount to the window, not the other way around.
How to measure any window before you build
You need three numbers for every window: the clear glass width, the clear glass height, and the depth of the frame or sill. Use a tape measure and write the numbers down.
- Glass width and height: measure the flat, unobstructed pane. Subtract at least 2 inches from each side so the perch does not press on the frame or weatherstripping.
- Frame depth: measure from the glass surface to the inner face of the frame. A tension rod needs at least 1.5 inches of solid frame to press against; less than that and the rod will slip.
- Sill depth: measure front to back. A tray perch needs at least 4 inches of sill to rest on if you are not hanging it from suction cups.
A common renter mistake is measuring the whole window opening instead of the glass. A perch cut to the opening will not fit the pane, and a perch cut to the pane will not clear the frame.
Which mount works on which window
| Window Type | Best Perch | Why It Works | Avoid |
|---|---|---|---|
| Large smooth sash or fixed pane | Suction cup hammock | Flat glass gives the cups a full seal | Tension rod (frame may be too shallow) |
| Small casement | Narrow tray perch or corner shelf | Keeps the crank and screen clear | Wide wood board (blocks the crank) |
| Deep wooden frame | Tension rod shelf | The rod presses against solid wood | Suction cups (frame is not glass) |
| Sliding glass door | Suction cup hammock on the fixed panel | The fixed pane does not move | Bracket build (no frame to drill) |
| Textured, frosted, or filmed glass | Tension rod shelf or freestanding perch | No suction seal needed | Any suction cup |
| Awning or hopper window | Freestanding or furniture-supported perch | The sash opens outward and cannot carry a load | Tension rod (sash moves) |
Two window types deserve a warning. Casement windows have a crank and a screen; a perch that covers either one is a safety problem, not just an inconvenience. Sliding glass doors have a fixed panel and a moving panel; mount only on the fixed side, and check that the perch does not block the track or the lock.
Small windows and narrow panes
A small window is not a reason to skip a perch. It is a reason to go narrow. A tray perch 10 to 12 inches wide or a corner shelf that fits the frame gives a cat a seat without blocking the light.
For a narrow pane, measure the glass width and subtract 4 inches. That is your maximum perch width. If the result is under 10 inches, use a corner shelf or a freestanding perch instead of a hammock.
Check the lease before you mount anything
Most leases allow removable fixtures, but the definition of "removable" varies. Before you mount a tension rod or a suction perch, read the lease for language about window coverings, hardware, and alterations. If the lease is silent, ask the landlord in writing and keep the reply. A tension rod that leaves no holes is usually fine; a bracket screwed into the frame is usually not.
Costs, Tools, and Build Time for Each Idea
Cost and build time vary widely across these ideas, and the cheapest option is not always the fastest. A tray perch can cost almost nothing if you already own a tray. A wood hammock needs a few tools and a hardware run. Here is the realistic breakdown, with material quantities and a buy-versus-build comparison so you can choose before you shop.
Material and cost breakdown
Prices below are typical U.S. retail ranges for new materials at a hardware store or online. They do not include tools you may already own.
| Idea | Materials | Typical Cost | Tools Needed | Build Time |
|---|---|---|---|---|
| Suction cup hammock (ready-made) | None | $20-$60 | None | Minutes |
| Old tray perch | One tray, 2 suction-cup hooks, batting, 1/2 yard fleece or faux fur, craft glue | $10-$25 | Scissors, glue, sandpaper | Under 1 hour |
| Tension rod shelf | Tension rod, 1 shelf board, 2 shelf brackets, screws | $25-$45 | Tape measure, saw, screwdriver | 1-2 hours |
| Wood and fabric hammock | 1/2-inch plywood, 2 shelf brackets, batting, 1 yard fabric, staples | $30-$55 | Drill, stapler, saw, sandpaper | 2-4 hours |
A few notes on the numbers. A 2-foot by 4-foot sheet of 1/2-inch plywood is enough for two perch boards and typically runs $15-$25. Batting and a yard of fleece or faux fur usually add $10-$20.
Buy versus build
Building is cheaper only if you already own the tools. A drill and a staple gun together can cost more than a ready-made perch, and a renter who moves often may not want to store them.
If you want the no-tool route, a ready-made option saves the whole project. The Proudpetshop Sunspot Perch ($24.99) mounts with suction cups on smooth glass and holds up to 44 lbs.

Time and difficulty at a glance
- Easiest and fastest: ready-made suction hammock, minutes, no tools.
- Cheapest if you own a tray: old tray perch, under an hour, scissors and glue.
- Best for deep frames: tension rod shelf, 1-2 hours, one saw cut.
Frequently Asked Questions
How can I make a cat window perch without drilling?
The two renter-safe routes are suction cup mounts and compression builds. Suction cup perches, like the Proud Pet Shop Sunspot Perch at $24.99, press onto clean glass and hold up to 44 lbs with no tools. Compression builds use a tension rod or shelf brackets wedged into the window frame, so nothing is screwed into the wall. Both leave no holes. Clean the glass with rubbing alcohol first, and check suction cups weekly for grip before your cat jumps up.
Are suction cup cat window perches safe?
They are safe when the glass is smooth, clean, and the perch is rated above your cat's weight. The Proud Pet Shop Skyview Lounge uses four high-strength suction cups with reinforced support brackets and is verified to hold 30 lbs. Avoid textured, tinted film, or dirty glass, which weaken the seal. Re-press the cups every week, and place the perch low enough that a slip is a short drop. Never mount one over a bed of sharp objects or a stairwell.
How much weight can a DIY cat window perch hold?
It depends entirely on the mounting method. A suction cup perch is limited by its rated capacity, typically 30 to 44 lbs for quality units. A shelf-bracket build anchored into studs can hold far more, but a tension rod setup is only as strong as the rod and the frame it presses against. Always build to at least double your cat's weight, and test the empty perch with a sandbag or hand pressure before your cat uses it.
What materials are best for a DIY cat window perch?
Pine or plywood boards around 1 inch thick make a sturdy base without excess weight. Cover the platform with batting and a removable faux fur or fleece cover so it can be washed. Old trays, cutting boards, and reclaimed shelf boards work well as repurposed platforms. For the frame, use coated shelf brackets or a rubber-footed tension rod. Avoid particle board, which sags and crumbles under a jumping cat.