
Table of Contents
- Why a Dog First Aid Kit Matters on the Trail
- Pet First Aid Kit Checklist: Essential Supplies
- How to Treat Dog Paw Cuts While Hiking
- Dog Camping Safety Tips for Injury Prevention
- Packing Your Kit: Organization and Weight Optimization
- Customizing Your Kit by Dog Size and Trip Duration
- Conclusion
- Frequently Asked Questions
Last Updated: September 22, 2026
Why a Dog First Aid Kit Matters on the Trail
Learning how to pack a dog first aid kit for camping is essential. When miles from a veterinarian, basic supplies can mean the difference between a minor injury and serious emergency. Dogs on trails face cuts, sprains, tick bites, and heat exhaustion, and without proper gear, small wounds become infected.
Situations escalate fast outdoors: paw cuts bleed heavily, embedded ticks transmit disease, and dehydration accelerates at altitude. Preparation before emergencies happen is critical.
A well-stocked dog first aid kit for camping gives you confidence and control when your dog needs help most. This guide covers what to pack, how to organize it, and how to use it.
Pet First Aid Kit Checklist: Essential Supplies
Organize supplies by category so you find what you need quickly under stress.
Wound Care and Bandaging Supplies
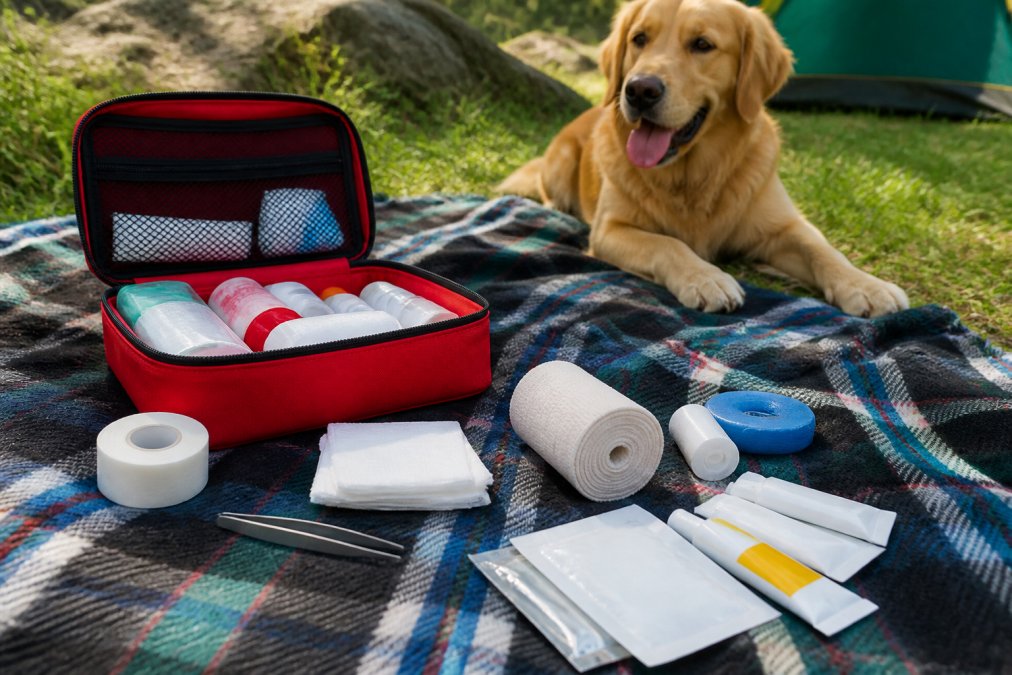
Wounds happen constantly on trails from sharp rocks, thorns, and branches. Sterile gauze pads stop bleeding and prevent infection.
Pack these wound care essentials:
- Sterile gauze pads (2x2 and 4x4 inch sizes)
- Self-adhering bandage wrap (holds gauze without sticking to fur)
- Antiseptic wipes (alcohol-free to avoid stinging)
- Antibiotic ointment (apply after cleaning to prevent infection)
- Saline solution (for gentle wound irrigation)
- Medical tape (waterproof, holds bandages securely)
- Pressure bandage (for serious bleeding, applies firm pressure)
- Hydrogen peroxide (for cleaning, though use sparingly)
Pack multiple sizes: 2x2 pads for small cuts, 4x4 for deeper wounds. Self-adhering bandage sticks to itself, not fur, making removal painless.
Tools and Instruments
Essential tools include tweezers for ticks and splinters, a thermometer for fever or hypothermia, and an irrigation syringe to flush debris.
Include these tools:
- Tweezers (fine-tipped for tick removal)
- Tick removal tool (specialized design prevents leaving mouthparts behind)
- Irrigation syringe (10-20 mL for wound cleaning)
- Thermometer (digital, waterproof)
- Latex-free gloves (protects you and your dog)
- Hemostatic agent (stops bleeding fast if pressure doesn't work)
- Emergency muzzle (injured dogs may bite, safety first)
Improper tick removal leaves the head embedded, causing infection. An irrigation syringe flushes wounds with saline without hand contamination.
Documentation and Emergency Contacts
Medical history and identification are as important as bandages. Veterinarians need this information if your dog is lost or injured.
Bring these documents:
- Microchip information (registration number and contact details)
- Veterinary records (vaccines, allergies, medications)
- Recent photo of your dog (helps if they get lost)
- Emergency contact numbers (your vet, emergency clinic, poison control)
- Insurance information (if you have pet insurance)
- Medication list (any prescriptions your dog takes)
Store documents in a waterproof bag. Include your veterinarian's phone number and the nearest 24-hour emergency clinic along your route. The Proud Pet Shop Smart Finder Tag clips on securely and sends alerts if your dog wanders out of range.

How to Treat Dog Paw Cuts While Hiking
Paw cuts are the most common trail injury. Sharp rocks, broken glass, or thorns cut pads easily. Bleeding looks dramatic but is usually manageable with proper treatment.
Assessment and Immediate Response
Stop immediately and examine the paw in good light. Remove visible debris with clean tweezers or gloved fingers. Superficial cuts (less than ¼ inch deep, minimal bleeding) are minor. Deep cuts (¼ inch or deeper, heavy bleeding after 2 minutes of pressure) require veterinary evaluation.
Apply direct pressure with sterile gauze for 5-10 minutes without lifting. Continuous pressure stops bleeding. If your dog licks the wound, redirect their attention or use the emergency muzzle to prevent bacterial contamination.
Cleaning and Wound Care
Once bleeding slows, flush the wound with saline using your irrigation syringe from multiple angles. Embedded dirt causes infection faster than the cut itself. Pat dry with clean gauze; do not rub.
Apply antibiotic ointment to prevent bacterial growth and speed healing. Cover with self-adhering bandage wrap, which sticks to itself rather than fur.
Field Decision: Treat or Evacuate
Evacuate and seek veterinary care immediately if: bleeding doesn't stop after 15 minutes, the cut is longer than ½ inch or deeper than ¼ inch, the cut is on toe webbing or pad edge, your dog shows shock signs (pale gums, rapid breathing, weakness), the wound is contaminated, or your dog cannot bear weight after 30 minutes.
Keep the paw clean and wrapped during evacuation.
Ongoing Care and Infection Monitoring
Change bandages daily and watch for infection signs: increasing swelling after day 2, discharge, odor, worsening limping, heat, or obsessive licking. Seek veterinary care if infection develops.
Practice Drill: Building Confidence Before the Trail
Practice at home before your trip: simulate bleeding wounds with pressure drills, practice irrigation, bandage a healthy paw, test your muzzle, and locate supplies in the dark. These 15-minute drills transform you from someone with supplies to someone who can use them.
Proud Pet Shop Smart Finder Tag →
Dog Camping Safety Tips for Injury Prevention
Most trail accidents are avoidable with planning. Prevention strategy depends on terrain, desert, alpine, and forest hazards differ. Know your evacuation plan before you need it.
Terrain-Specific Hazard Preparation
Desert terrain: Pack extra gauze and antibiotic ointment. Bring 1 ounce of water per pound of body weight per hour. Consider protective booties to prevent pad cuts. Watch for heat exhaustion: excessive panting, drooling, weakness, or glazed eyes. If signs appear, stop, find shade, and cool with water on paws and belly.
Pre-Trip Conditioning and Fitness Assessment
Build distance gradually over 4-6 weeks. Start with short walks (1-2 miles) on easy terrain, increasing by no more than 10% per week. Include elevation gain in the final 2 weeks. Older dogs and those with joint issues need veterinary clearance before backcountry hiking.
Hydration and Nutrition Strategy
Bring 0.5-1 ounce of water per pound of body weight per day, plus extra for heat or elevation. Offer water every 30-45 minutes on warm days. Bring a collapsible bowl and high-calorie treats to maintain energy.
Leash Management and Off-Leash Risk
Keep your dog on a leash in unfamiliar terrain. Use a 6-foot leash for most hiking; use a 4-foot leash near cliffs, water, or dense brush. Avoid retractable leashes on trails.
Weather Monitoring and Trip Adjustment
On hot days (above 75°F), hike early morning or evening. Watch for heat exhaustion: excessive panting, drooling, weakness, or glazed eyes. Stop and cool your dog if signs appear. On cold days (below 40°F), bring a dog jacket and watch for shivering or reluctance to move, signs of hypothermia.
Pre-Trip Route Research and Hazard Identification
Research the trail before you go. Know about steep drop-offs, river crossings, and poisonous plants. Check recent trip reports for hazards. Identify the nearest veterinary clinic and emergency animal hospital along your route.
Post-Injury Evacuation Planning
Plan evacuation before heading to the backcountry. Small dogs (under 25 pounds) can be carried in a backpack. Medium dogs (25-60 pounds) can be improvised on a stretcher using a tarp and branches. Large dogs (over 60 pounds) require rescue calls or slow hiking out.
Packing Your Kit: Organization and Weight Optimization
Choose multi-use items and avoid duplicates. Organize by category in small waterproof bags: wound care, tools, and documentation. Use compression to reduce bulk, roll gauze tightly and remove excess packaging.
Here's a weight-conscious packing strategy:
| Category | Item | Purpose | Weight |
|---|---|---|---|
| Wound Care | Sterile gauze pads (assorted) | Stop bleeding, cover wounds | 1 oz |
| Wound Care | Self-adhering bandage wrap | Secure gauze without sticking to fur | 0.5 oz |
| Wound Care | Antiseptic wipes | Clean wounds safely | 0.5 oz |
| Tools | Tweezers | Remove ticks and splinters | 0.2 oz |
| Tools | Irrigation syringe | Flush wounds clean | 0.3 oz |
| Tools | Thermometer | Detect fever or hypothermia | 0.5 oz |
| Documentation | Vet records + emergency contacts | Medical reference and help | 0.2 oz |
Customizing Your Kit by Dog Size and Trip Duration
A Chihuahua's kit looks different from a German Shepherd's. A weekend trip needs less than a week-long expedition. Customize based on your dog and your plans.
Small dogs (under 20 pounds):
Large dogs (over 50 pounds):
Weekend trips (1-2 nights):
Week-long expeditions:
Dogs with known conditions:
Conclusion
Understanding how to pack a dog first aid kit for camping takes 20 minutes and costs less than a single vet visit. The supplies are lightweight, compact, and invaluable when emergencies happen. A prepared dog owner is a confident dog owner.
Frequently Asked Questions
What should be in a dog's camping first aid kit?
A complete dog camping first aid kit includes sterile gauze pads, self-adhering bandages, antiseptic wipes, antibiotic ointment, medical tape, tweezers for tick removal, a thermometer, latex-free gloves, an irrigation syringe, saline solution, and emergency contact information. Include a pet-safe antihistamine, blister care supplies, and paw pad protection. Keep everything in a waterproof container organized by category so you can find items quickly during an emergency.
How do I treat a dog's paw injury while camping?
First, calm your dog and examine the paw for debris or thorns. Rinse the wound with saline solution using an irrigation syringe to remove dirt. Apply antiseptic wipes to clean the area, then pat dry with sterile gauze. If bleeding continues, apply pressure with a clean pad for 5-10 minutes. Once bleeding stops, apply antibiotic ointment and cover with a self-adhering bandage or medical tape. Monitor the wound for signs of infection like swelling or discharge. If the cut is deep or won't stop bleeding after 15 minutes, head to the nearest veterinary clinic.
Do I need a separate first aid kit for my dog?
Yes, a dog-specific first aid kit is essential. Human first aid supplies aren't always safe for dogs, and you'll need pet-specific items like pet-safe antihistamines and appropriately sized bandages. A dedicated kit ensures you have the right tools and medications on hand without having to improvise. Keep it easily accessible in your backpack or vehicle so you can respond to injuries immediately.
What are the most common camping injuries for dogs?
The most common camping injuries include paw cuts from sharp rocks or sticks, tick and burr attachment, insect bites, hypothermia prevention needs in cold weather, and minor wounds from falls or scrapes. Dehydration and overheating are also frequent issues. Knowing how to handle these common problems, from tick removal to wound irrigation, will help you manage most situations before they require emergency veterinary care.